Recent Water Damage Posts
Restoring Landscaping After Water Damage to Your Lawn & Garden
2/14/2024 (Permalink)
Water damage doesn't just affect the interiors of our homes; it can also leave a lasting impact on the outdoor oasis we've cultivated. When floods or excessive water wreak havoc on our lawns, gardens, and soil, restoring the natural beauty of our landscape becomes a crucial part of the recovery process. In this blog, we'll explore the steps and tips for rejuvenating your outdoor haven after water damage.
Assess the Damage
Before diving into restoration, assess the extent of the damage to your landscaping. Identify areas of erosion, soil displacement, and the condition of plants. This evaluation will guide your restoration plan.
Remove any debris, silt, or mud deposited by the water. This may involve raking, shoveling, or using a wheelbarrow to clear away the remnants of the flood. Clearing debris helps create a clean slate for the restoration process.
Aerate Compacted Soil
Water damage can lead to soil compaction, limiting the flow of air, water, and nutrients to plant roots. Use aeration tools to loosen compacted soil, promoting better drainage and root development.
If water has caused uneven terrain or altered the grading of your landscape, regrade the affected areas. This helps prevent future water pooling and ensures proper water flow away from structures.
Inspect and Trim Damaged Plants
Inspect the condition of your plants. Trim damaged or dead branches to encourage new growth. Prune shrubs and trees strategically to maintain a balanced and healthy landscape.
In cases where plants are severely damaged or beyond recovery, consider replacing them. Choose resilient, water-resistant species that are well-suited to your climate and soil conditions.
Restore Soil Fertility
Floodwaters can wash away essential nutrients from the soil. Restore fertility by adding organic matter such as compost or well-rotted manure. This replenishes nutrients and supports healthy plant growth.
For areas with bare soil, reseed or replant to reintroduce greenery. Choose grass or plants that thrive in your region and match the specific conditions of your landscape.
Implement Erosion Control Measures
To prevent further soil erosion, implement erosion control measures. Mulch, ground cover plants, and retaining walls can help stabilize the soil and protect against future water damage.
Address drainage issues by installing proper drainage systems. French drains, swales, and other drainage solutions can redirect water away from vulnerable areas, preventing waterlogging. Regularly monitor your irrigation system to ensure it aligns with the current needs of your landscape. Adjust watering schedules based on weather conditions and the recovery stage of your plants.
Apply Grass Seed and Fertilizer
If your lawn has suffered significant damage, consider overseeding with grass seed and applying a balanced fertilizer. This promotes a lush, healthy lawn and helps cover bare patches.
If your garden is prone to flooding, consider creating raised garden beds. This elevated design helps prevent waterlogging and provides better control over soil conditions.
Introduce Native Plants
Native plants are well-adapted to local conditions and often require less maintenance. Introduce native species to enhance the resilience of your landscape against future water-related challenges.
Restoring your landscaping after water damage is not just about bringing back the greenery; it's about nurturing a living, breathing outdoor space that reflects the resilience of nature. By following these steps and tips, you'll not only revive your lawn, garden, and soil but also create an environment that blooms back to life, standing as a testament to the regenerative power of nature.
The Importance of Dehumidification
10/14/2023 (Permalink)
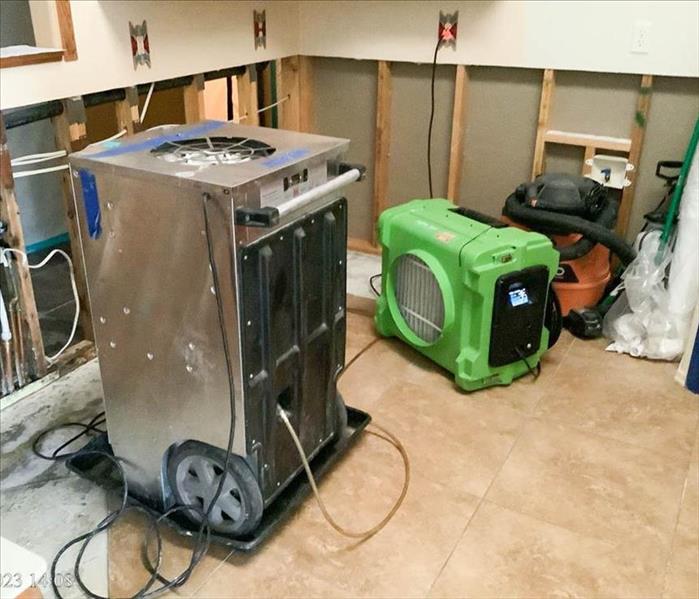 Humidity refers to the amount of moisture or water vapor present in the air.
Indoor air quality is a crucial factor in maintaining a healthy and comfortable environment for both residential and commercial spaces. High humidity levels can lead to a host of issues, including musty odors, mold growth, and other problems. This is where the science of dehumidification comes into play. By understanding the principles and benefits of dehumidification, we can restore and maintain optimal indoor air quality.
Humidity and Its Impact on Indoor Air Quality
Humidity refers to the amount of moisture or water vapor present in the air. It is typically measured as a percentage known as "relative humidity." The optimal indoor relative humidity level is considered to be between 30% and 50%. When humidity levels exceed this range, various problems can occur. High humidity promotes the growth of mold, mildew, and dust mites, which can trigger a host of issues. It creates a breeding ground for bacteria and viruses. Additionally, excess moisture can damage furniture, electronic equipment, and structural components of buildings.
The Science of Dehumidification
Dehumidification is the process of removing excess moisture from the air, thus reducing the relative humidity to a more acceptable level. The science behind dehumidification involves several key concepts.
Dehumidifiers work on the principle of condensation. As warm, humid air is drawn into the dehumidifier, it passes over a cool surface known as the evaporator coil. The cooler temperature causes the moisture in the air to condense into water droplets, which then collect in a reservoir or drain away.
Dehumidifiers utilize a refrigeration cycle similar to that of an air conditioner. The refrigeration system cools the air, causing the moisture to condense. The cold, dry air is then reheated before being released back into the room. This process reduces both humidity and temperature, creating a more comfortable environment.
Dehumidifiers are equipped with sensors that measure the humidity level in the room. Once the desired humidity level is reached, the dehumidifier automatically shuts off or adjusts its settings to maintain the ideal moisture balance. This precise humidity control ensures optimal air quality.
Benefits of Dehumidification
Dehumidification offers a multitude of benefits for indoor spaces. Maintaining proper humidity levels inhibits mold growth, preventing damage to furniture, walls, and other surfaces. It also helps to protect the occupants by reducing the presence of mold spores in the air.
High humidity can result in musty and stale odors. Dehumidifiers eliminate excess moisture, thereby preventing unpleasant smells and maintaining fresh indoor air. Excess humidity can damage furniture, artwork, and electronics. Dehumidification helps preserve the integrity of these valuable items, prolonging their lifespan.
Dehumidifiers can contribute to energy efficiency by reducing the workload on air conditioning systems. When humidity levels are lowered, it takes less energy to cool the space, resulting in energy cost savings.
Understanding the science of dehumidification provides us with the knowledge to restore and maintain optimal indoor air quality. By controlling humidity levels, we can prevent mold growth, eliminate odors, and protect valuable property. Dehumidifiers play a crucial role in this process, utilizing condensation and refrigeration cycles to remove excess moisture from the air. Investing in a high-quality dehumidification system can greatly improve the overall comfort and well-being of both residential and commercial spaces.
Addressing a Common Kitchen Woe: What to Do When Your Dishwasher Leaks
7/20/2023 (Permalink)
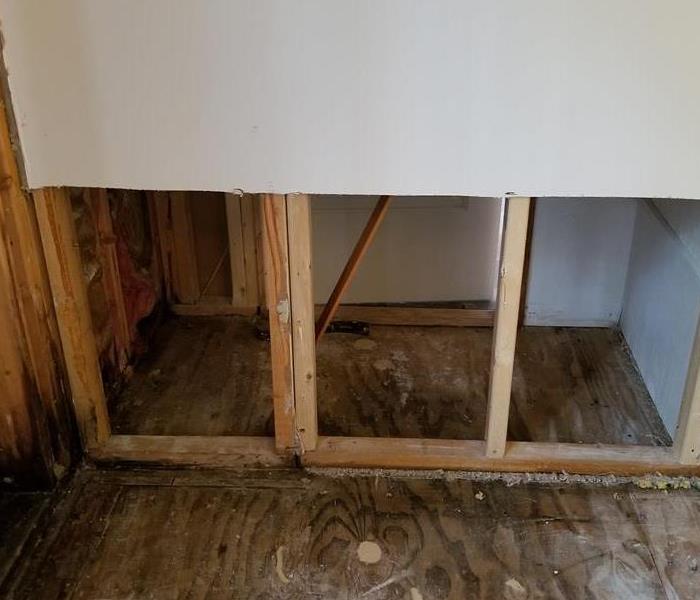 When your home suffers from a leaking dishwasher, call a professional to assist.
A leaking dishwasher can quickly turn a mundane household chore into a frustrating problem. Not only can it cause water damage to your kitchen floor and cabinets, but it can also disrupt your daily routine. In this blog, we will provide you with a step-by-step guide on what to do if your dishwasher leaks. By following these proactive measures, you can address the issue swiftly and minimize any potential damage.
Step 1: Shut off the Power and Water
As soon as you notice the dishwasher leaking, turn off the power supply to prevent any electrical hazards. Locate the circuit breaker or switch that controls the dishwasher and turn it off. Additionally, turn off the water supply by closing the shutoff valve located under the sink or near the dishwasher.
Step 2: Assess the Leakage Source
Before taking any further action, identify the source of the leak. The most common areas of leakage include the door seal, drain hose, water inlet valve, or the bottom of the dishwasher. Carefully inspect these areas to determine where the water is coming from. Keep in mind that leaks may be visible during different stages of the dishwasher's cycle, so observe the unit for a complete picture.
Step 3: Clear the Area and Remove Excess Wate
To prevent further damage, remove any standing water from the kitchen floor. Use towels, mops, or a wet/dry vacuum to absorb the water and dry the area as much as possible. This will help minimize the risk of slips and falls and prevent additional damage to the flooring or nearby furniture.
Step 4: Check and Tighten Connections
Often, leaks can occur due to loose or damaged connections. Inspect the water supply line, drain hose, and any other visible connections for signs of looseness or damage. Tighten any loose connections using a wrench or screwdriver, ensuring they are secure but not overtightened. If you identify any damaged parts, such as cracks or holes, they may need to be replaced.
Step 5: Clean the Dishwasher
Sometimes, leaks can be caused by clogs or debris obstructing the drainage system. Remove the dishwasher's bottom rack and thoroughly inspect the drain area for any food particles, debris, or blockages. Use a soft brush or cloth to clean the drain and remove any obstructions. This simple maintenance step can often resolve minor leaks.
Step 6: Test for Leaks
After performing the necessary checks and repairs, it's crucial to test the dishwasher for leaks. Turn on the water supply and power, then run a short cycle to see if any leaks persist. Observe the unit closely during this test and check for any signs of leakage. If the problem persists, it may be advisable to contact a professional appliance repair technician for further assistance.
Step 7: Prevent Future Leaks
To minimize the chances of future leaks, it's important to practice regular dishwasher maintenance. This includes cleaning the filters, inspecting hoses and connections periodically, and avoiding overloading the dishwasher. Additionally, using the appropriate detergent and following manufacturer guidelines will help ensure the longevity and efficiency of your dishwasher.
Dealing with a leaking dishwasher can be a hassle, but by following these steps, you can effectively address the issue and prevent further damage. Remember to prioritize safety by shutting off the power and water supply, assess the leakage source, clear the area, check and tighten connections, clean the dishwasher, and test for leaks. Regular maintenance and preventive measures will go a long way in keeping your dishwasher in optimal condition and minimizing the chances of future leaks. If the problem persists or seems complex, don't hesitate to seek professional assistance to resolve the issue promptly and efficiently.
4 Signs Your Toilet Needs to Be Replaced
3/9/2023 (Permalink)
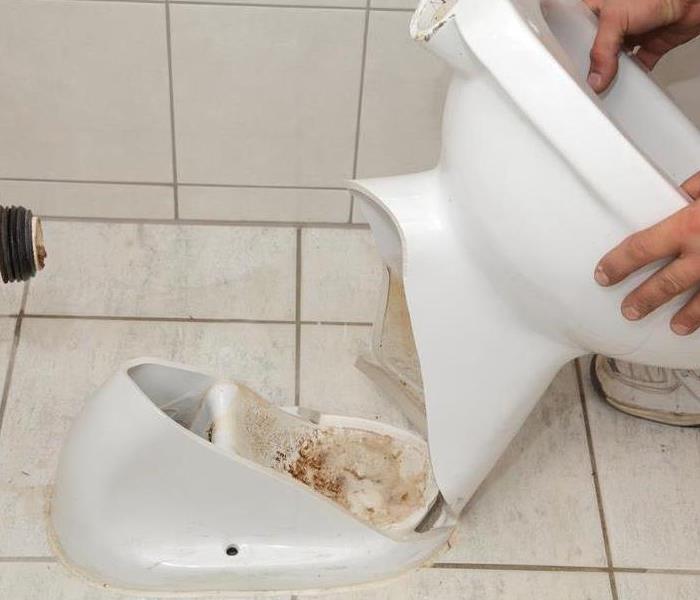 Replace a toilet leaking to prevent future water damage.
When it comes to the bathroom, we have a lot of feelings. We want our toilet to be clean and functional. In order for that to happen, you need a toilet that's in good working order. If your toilet is old, cracked or broken, or not flushing properly—it's time for a replacement! The first step in replacing your toilet is knowing what signs indicate it's time for a new one.
Why it's important to replace the toilet
The toilet is a necessary fixture in any home, but if it's not properly maintained or replaced when necessary, it can cause serious damage and cost you money. Replacing your toilet is an investment that will pay off in the long run.
Here are some reasons why:
- Not replacing your toilet can lead to leaks and cracks in the floor around it. This can result in expensive repairs or even damage to surrounding walls and floors if left untreated for too long.
- The condition of your existing plumbing system affects how much water is used each day--and this means that if there are leaks from old pipes or fixtures around them, then this will increase how much water you use each day, leading to a higher water bill.
The toilet is old
Older toilets can be a source of frustration, especially if they're causing problems. If your toilet is more than 15 years old and has never been repaired or replaced, there's a good chance that it needs to be replaced.
Old toilets can be difficult to fix due to their age and design--it's not uncommon for older models not to have any parts available anymore. A malfunctioning toilet may also require expensive repairs like replacing major parts like the tank or bowl. Even if you're able to find replacement parts for your out-of-date model, repairing an old toilet could wind up costing more than simply buying a new one would have cost in the first place!
In addition to being expensive and difficult, older models aren't energy efficient either; many older designs use more water per flush than newer ones do today--and since more households are concerned about conserving resources these days, this could impact them financially by increasing their monthly bills.
The toilet is cracked or broken
If your toilet is cracked or broken, it's time to replace it. A cracked or broken bowl could lead to leaking and flooding. If you have a cracked tank, bacteria can get into the cracks and cause foul odors that are difficult to remove from your bathroom. The same goes for broken flanges (the metal rings that hold your toilet onto its base), seats, and lids--if one of these parts breaks off completely, you'll need new ones before using your bathroom again!
The toilet is wobbling
If you notice your toilet rocking or wobbling, it could be a sign that some bolts are loose. Loose toilet bolts can cause all kinds of problems. If there's not enough support under the base of your toilet, then it may rock or wobble when someone sits on it. You should also check to see if there are any cracks in the porcelain around where the bowl meets with the floor or tank.
A wobbling toilet could also indicate a bigger problem, such as damage to the floor beneath the toilet. Damage underneath the toilet can occur if a leak is present, causing the flooring to rot or warp.
The toilet isn't flushing properly
If you notice that the toilet isn't flushing properly, it's time to replace it. This can be caused by a number of things:
- The bowl is clogged
- The tank is leaking water
- The flapper is worn-out or damaged
- The rim jets are blocked
Replacing your toilet will make your bathroom look better, function better, and prevent water damage too!
If your toilet is older than ten years, it's time to replace it. If you have an old or cracked toilet with signs of water damage, consider replacing it immediately! A new toilet will not only look better but also function much better than an old one. If you notice any wobbling or if your family members complain about how often they have to flush because the bowl does not flush properly anymore--then these are signs that show there may be problems with your current system's ability to handle waste efficiently.
Replacing your toilet is one of the easiest ways to improve your bathroom. It will look better, function better and save you money in the long run by preventing water damage too!
How Leaky Toilets Can Cause Bigger Problems
8/23/2022 (Permalink)
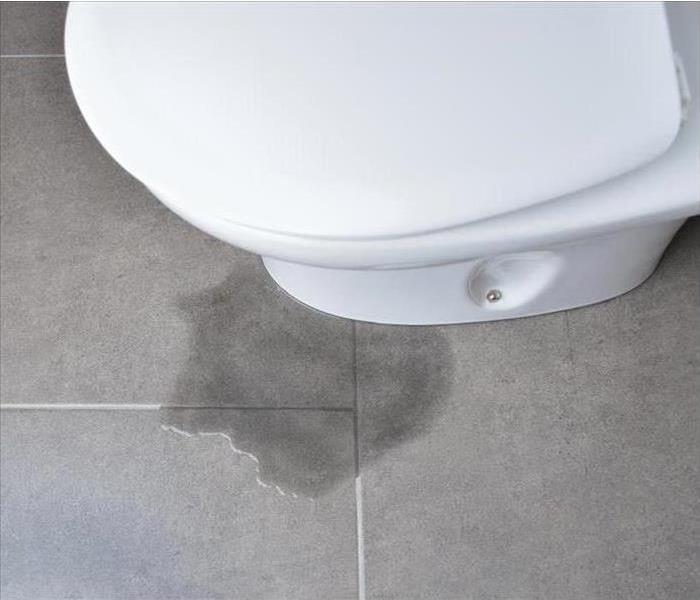 Pay close attention to determine from where the water is leaking
A leaking toilet is a common household problem, so you might think it is an easy fix. In some cases, you are right, but in other situations, you might need some help. Here are some common reasons toilets leak and how they can lead to bigger issues that require a professional.
Reasons Toilets Leak
The way to inspect a leaky commode is to flush it. Pay close attention to determine from where the water is leaking. Where the water comes from and pools can lead you to diagnose some of these common problems:
- Cracks in the tank
- Loose tank bolts
- Loose or damaged supply lines
- A dry wax ring
- A broken flange
These are just a few issues that can lead to water on your bathroom floor.
Deciding If You Can Fix It Yourself
Starting from the top of your toilet and working your way down is an easy, systematic way to check for leaks. Some fixes only require a wrench and a few new parts. Water lines, wax rings and other toilet components are relatively inexpensive and easy to replace. However, if you get to the bottom and only just discovered where the water is coming from, there could be more serious issues than just a leaking toilet.
Dealing With Water Damage
Until you have the toilet unbolted from the floor and see what is going on underneath it, you won’t be sure just how bad the situation is. If a commode has been leaking for a long time, there could be severe water damage to your floor and the subfloor underneath. Evidence of soft floors and rot is serious, and it is best to call water damage professionals in cases where the structure of your home might be compromised by a bathroom leak.
If you find yourself with a leaking toilet, assess the severity of the situation, and decide if you need to call a local water damage company in Phoenix, AZ to check it out.
What You Should Know About Water Damage and Your Insurance Policy
6/23/2022 (Permalink)
 While a flood in your home can cause a lot of worry, the claims process can go more smoothly if you take the appropriate actions.
Water Damage And Your Insurance Policy: What You Should Know
If a pipe breaks in your Peoria, AZ home and causes water to flood your home, the good news is that this will most likely be covered by your homeowners insurance. While this is usually a covered peril, however, there are some exceptions. The following are a few questions that you might have regarding your policy.
1. When is Damage Covered by Insurance?
When you experience water damage from a broken or leaky pipe, the cost of resulting damage will likely be covered. If the flood is the result of a broken pipe caused by freezing weather or a sudden accident, this will usually be included in your policy. However, you will often be required to pay for any costs related to repairing and replacing the pipe.
2. When is Damage Not Covered by Insurance?
If the insurance company believes that the pipe has broken as a result of your own negligence, then you will likely be denied insurance coverage. This can happen if you have not taken proper precautions to prevent freezing pipes during cold weather or if you have failed to maintain your home. You may also be required to pay for damages if you wait too long to contact your insurance company and the damage has worsened in the meantime.
3. What Should You Do When You Discover the Damage?
To prevent your insurance company from denying your claim, you should be sure to contact them as soon as possible. You should also hire a water damage remediation company to fix the broken pipe and do any necessary repairs in your home. While you wait for workers to arrive, you can begin documenting the damage and making temporary repairs to prevent water from spreading.
While a flood in your home can cause a lot of worry, the claims process can go more smoothly if you take the appropriate actions. Performing regular maintenance on your home can prevent problems and will make it easier to be approved for coverage if an accident does happen.
Flooded Basement: What is and Isn't Covered by Insurance
5/23/2022 (Permalink)
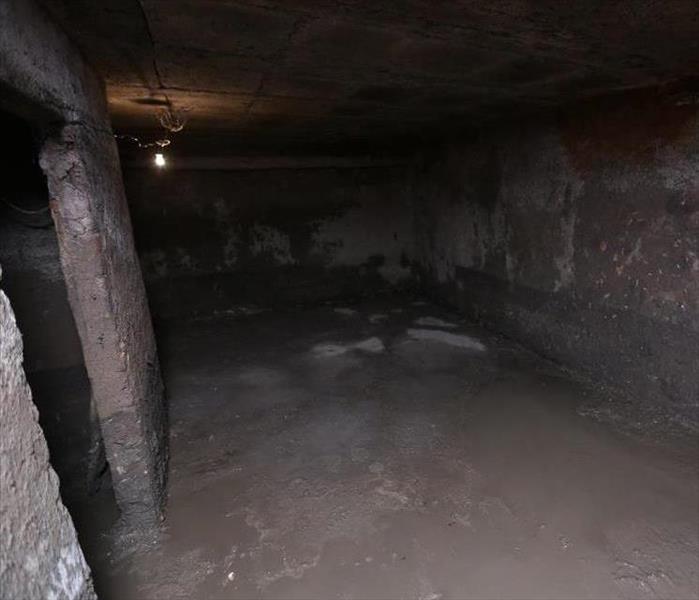 When you identify the source of the water in the basement, you might expect the insurance company to cover the repairs, but you can be wrong.
What Is And Isn't Covered By Insurance In The Case Of A Flooded Basement
If you come home to find your Anthem, AZ, basement full of water, you know that your first call should be to your insurance agent. However, you might be surprised that not everything is covered by your policy. Here is a breakdown of what kind of damage is and isn't covered by insurance.
Replacing or Repairing the Cause of the Basement Flood
When you identify the source of the water in the basement, you might expect the insurance company to cover the repairs. However, most policies won't cover the cost of repairs for whatever caused the flood. For example, insurance policies won't cover:
- Broken pipes
- Washing machine supply hose leak
- Damaged water heater
- Leaking dishwasher
- Leaking roofing system
You may be able to purchase additional insurance coverage to cover a leaking sewer main and have that repaired at no cost to you.
Damage Caused by Flood Waters
Most standard homeowners policies don't come with flood insurance. So, regardless of whether your basement flood happened because of an intense rainstorm or an overflowing body of water, such as a river or lake, you won't be covered unless you purchase additional coverage.
A simple online search will tell you your risk factor for your home flooding. If you're at a moderate to high risk, you'll want to ensure that you always carry additional flood insurance.
Removing and Repairing Damaged Personal Property
Your insurance policy will replace and repair any personal property damaged in a basement flood. They will also pay to have a water damage repair service come in and make any repairs to the structure of your home so that it is safe to live in. Depending on your coverage, you might have a deductible and coverage limits to consider when organizing the repairs.
A flooded basement can be a major hassle but ensuring you have additional coverage and relying on the pros for clean up will have your space back to normal before you know it.
Do you understand the three types of water pollution?
3/5/2022 (Permalink)
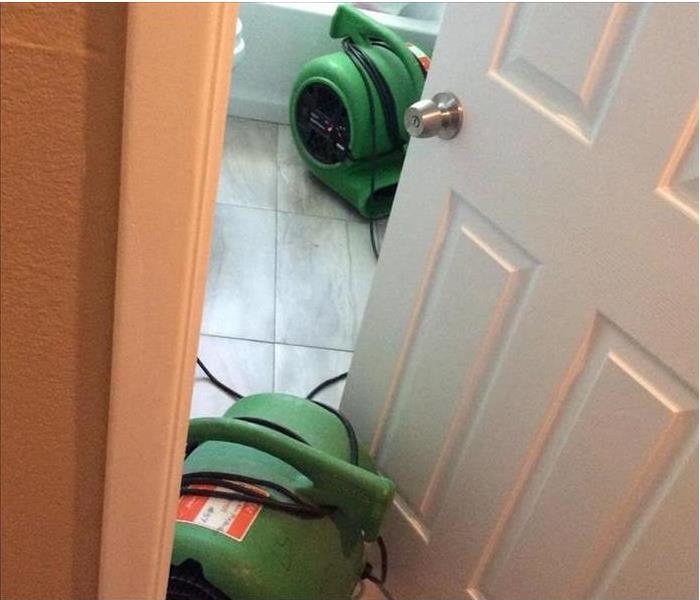 If your home is affected by water damage, call SERVPRO today. Our team is a leader and highly trained in water removal and restoration!
Do You Know What The Three Different Types Of Water Contamination Are?
In the normal course of life, most people don’t give much thought to their homes being invaded by a flood of any size – whether it comes from a simple toilet overflow or a rising river levels near your town of Rio Vista, AZ. Contaminated water can come from many sources and has three major stages, referred to as categories. Saving your affected belongings may depend on the type of contamination your home is exposed to, so understanding which type you are dealing with can be important.
Water Contamination Categories
• Category 1: “Clean Water” coming from leaky faucet or a broken supply line. Can transform into category 2 or 3 depending on temperature or length of time left standing.
• Category 2: “Gray Water” from dishwasher or washing machine overflow, toilet overflow contaminated with urine but no feces. Can contain viruses or bacteria. Can turn into category 3 if not cleaned up.
• Category 3: “Black Water” is water flooding from deep in toilet, rivers or streams contaminated with sewage, chemicals or microbial growth.
If acted on quickly, smaller clean water problems can often be cleaned up just by using a shop vacuum or the extraction setting of a carpet cleaner. After drying out the flooring, little or no contamination is left behind. Left untreated, however it can advance to a category 2 or even 3 event, so time is of the essence. A category three flood which involves contaminated water containing bacteria or viruses is more serious and can turn into a category 3 situation in no time.
Category 3 floods involve black water, or contamination that contains sewage or heavy chemicals. This situation is not to be taken lightly and you should call an emergency water restoration service in Rio Vista, AZ, to clean your flooring and belongings of all traces of contaminated water.
If the worst happens, remember the three categories of contamination and get the appropriate help to clean your home. It could make the difference between saving your home and belongings and starting over.
What Should You Do To Clean Up After a Toilet Floods?
2/6/2022 (Permalink)
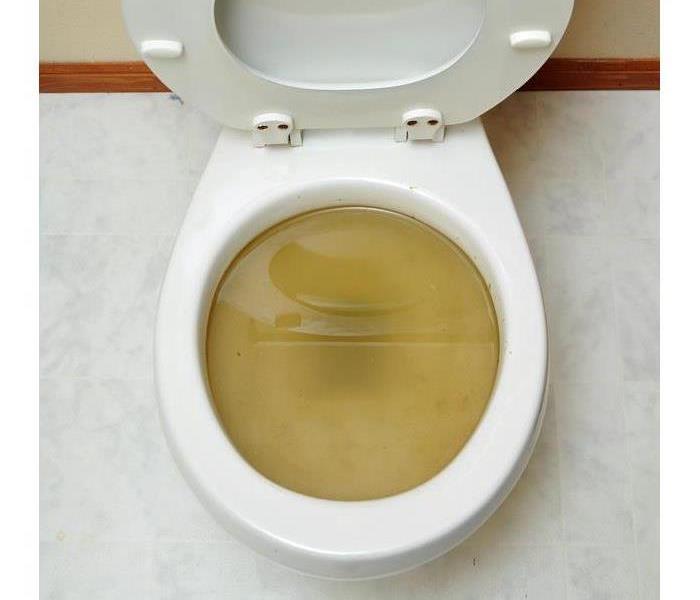 Sewer damage is responsible for much basement flooding and can also cause toilets to overflow.
What Should You Do If Your Toilet Has Flooded?
Nothing can disrupt the calm of your home quite like learning that your toilet is overflowing. It’s not just about the water, although you should be concerned about water damage, but a flooded toilet brings with it a lot of germs and bacteria and can also be a symptom of sewer damage at your home in Glendale, AZ. Acting in a timely manner and taking the proper measures can help minimize damage. But just how do you go about cleaning up sewage?
What To Do When You Have a Sewage Leak
- Shut off the water supply if possible
- Call for expert help from a sewage company
- Clean up the water
- Clear the blockage with a plunger or auger
- Clean and disinfect
Sewer damage is responsible for many basement floods in Glendale, AZ, annually and can lead to toilets overflowing as well. Hopefully, the toilet was empty and the overflow was caused by a faulty float. More often, you will need to clear a fecal matter or excessive paper blockage from the toilet by using a plunger. If that is not successful, you may need to use an auger - a long snake like device that can wriggle its way though most solid masses, breaking them up and letting them flush clear.
You should call a professional water and sewage company and get help with proper cleaning and drying out your floors and carpets and belongings. They can do a damage assessment and use their commercial strength extraction equipment and fans to remove water and dry things out. Those are the first steps to salvaging your home and it is crucial to make sure they are done properly. They can also help to make sure all contamination has been cleaned or removed from your home, leaving it “Like it never even happened.”
Whether from sewer damage or a flooded toilet, a leak or flood is never a pleasant prospect. But with proper help and cleaning, you can rest assured that your home can be restored to safe and condition again.


 24/7 Emergency Service


